
Introduction
Important! Before proceeding with this article, you should not have to conduct these steps unless specifically advised by a member of the Mosaic team. The acrylic pieces holding the merger together have been specially adjusted by our team, and re-assembly may cause further issues. Before attempting these steps, please refer to this support article.
This article is to help assist with re-assembly of the acrylic plates used to hold the merger together. We highly recommend that, if you do need to clear a blockage in your merger, you carefully remove this acrylic portion and hold them together, as re-assembly can be difficult. However, if these acrylic piece did come loose, we have a support article for you!
-
-
Remove the front plate of your Palette by removing these 6 screws and carefully removing the plate.
-
Once the front plate has been removed, unscrew the 2 screws which attach the acrylic plates to the cutter. Disassemble the acrylic plates if necessary and place to the side.
-
Lay the front plate of Palette so that the power cable hole is in the top-left corner to you. Line up the motors so that they fit into the front plate slots. You should see all four tubes of the merger pointed upwards.
-
-
-
You'll notice that there are markings on the acrylic plates (M1 to M4). We will be placing these in reverse order. Take the M4 acrylic plate and position it so the two holes for screws are pointed to the right, and the M4 is facing downwards. Push the four tubes in the middle, larger hole.
-
Take the M3 acrylic plate (the one that looks like a jigsaw puzzle piece). Position similarly as M4, with the two holes for screws pointed to the right. Carefully place each drive's tube into the corresponding corner.
-
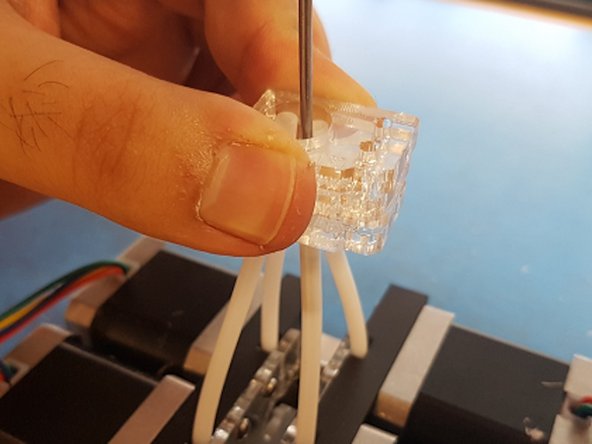
You'll notice that there are indents at the ends of each Teflon tube which fit securely into the corners of the M3 piece. This step is tricky, but the end result should look like the second photo.
-
-
-
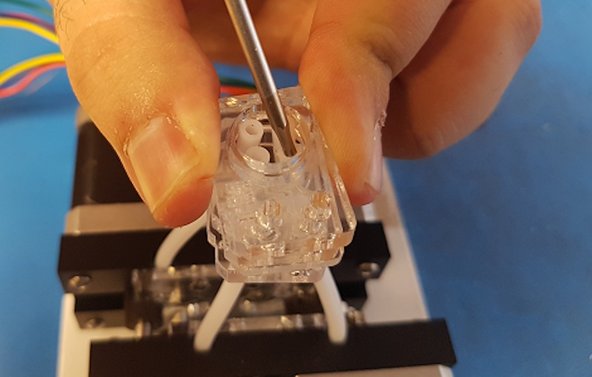
Stack the M2 plate in a similar position, and then place the M1 plate on top. You'll notice that the middle hole in the M1 plate is smaller than the other acrylic plates. You'll need to use a tool (such as a screwdriver) to help you carefully wedge the tubes together to fit.
-
The process of moving the the tubes may cause them to warp. Find a tool with a diameter of 1.9 mm or less and push through the tubes in ensure that filament won't get caught.
-
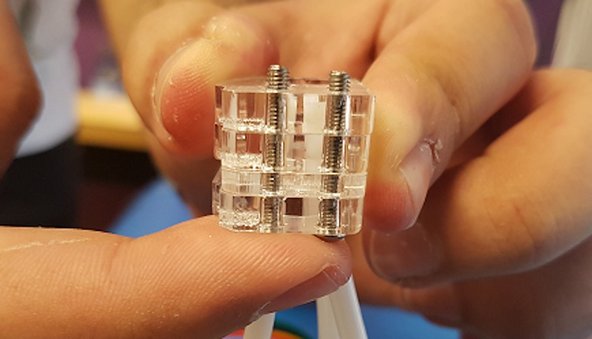
Hold the pieces carefully and replace the two screws, going from the bottom towards the top.
-
-
-
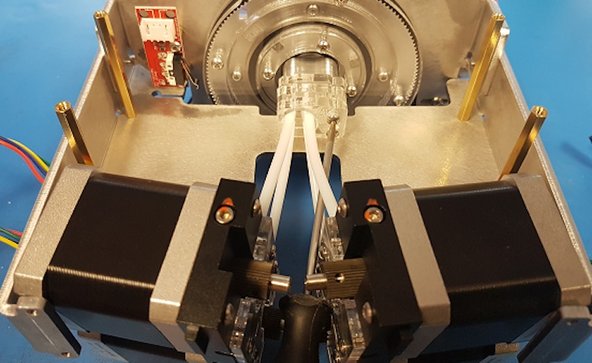
Remove the drives from the front plate. Carefully bring the acrylic plates and drives inside your Palette, and replace the two screws back onto the cutter wheel unit.
-
Once secured, replace the front plate of you Palette, making sure to line up the drives into their corresponding slots. Replace screws.
-


If you have any questions, please contact us at support@mosaicmfg.com.
If you have any questions, please contact us at support@mosaicmfg.com.
