
Introduction
Palette 2 (Pro) is now more reliable with the Palette 2S (Pro) Upgrade Kit. The following improvements can be made by installing the upgrade kit:
- Faster splicing with new splice core and thinner splice tubes
- New drive arm assemblies for better flexible printing
- Re-positioned homing switch to reduce wear
- Steel thumbscrews that are less likely to strip
Before beginning the upgrade process, please ensure that Palette is powered off and unplugged from the power supply and that you've updated to the latest firmware in order to enjoy the most recent benefits and features.
Tools
Parts
No parts specified.
Video Overview
-
-
Remove the ingoing drive cover by loosening the thumbscrews counter-clockwise.
-
Using the screwdriver, gently pry the springs on the drive arms in an upward direction on the end away from the drive arm.
-
This requires minimal force and will not damage your unit if done correctly. Use your finger on top to avoid the spring shooting out and potentially being lost or injuring you.
-
Unscrew and remove the existing drive arms including the one located at the outgoing drive. Retain the existing screws for the next step.
-
Place the new drive arms and screw them securely back into Palette. The arm should be able to move freely back and forth.
-
Align the spring with the locator lug on the drive arm and slide it in and down into the original location.
-
Don’t over-tighten screw - allow drive arm to spring back without too much tension. The springs provided with the kits are spare parts, you may use the existing Palette 2 springs.
-
-
-
Unscrew and remove old filament switches from drives 1-4.
-
You may use some tape to hold the cable in place to prevent it from sliding into the substructure.
-
Plug in the new filament switch to the cable, and screw it securely back into place.
-
When the switch is unplugged, keep the cables above the substructure using some tape. If the cable is very short, removing the bottom casing may be necessary to install the switch.
-
You may swap out the existing buffer filament switch for one of the spare switches in the upgrade kit, but it is not necessary.
-
-
-
Rotate the cutter wheel to the left until the bottom-middle tab of the acrylic homing switch cover is visible, and not covered by cutter wheel’s blade cover.
-
Remove the homing switch acrylic cover by loosening the thumbscrew counter-clockwise and tilting it up and out.
-
Unscrew and unplug the existing homing switch.
-
You may use some tape to hold the cable in place to prevent it from sliding into the substructure.
-
Plug in the new homing switch to the cable, and screw it securely back into place.
-
Reassemble the homing switch acrylic cover and tighten the thumbscrew.
-
-
-
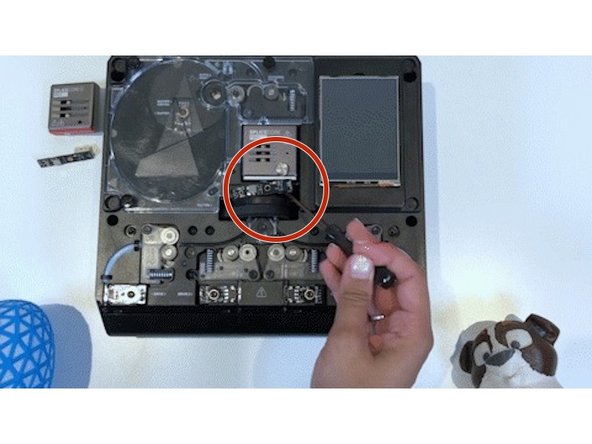
Rotate the thumbscrew counter-clockwise to loosen the splice core and remove it.
-
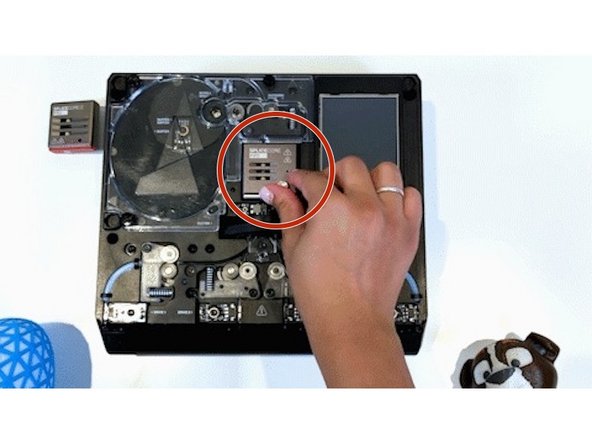
Install the P2S splice core. The Palette firmware will recognize new splice core* (elaborate on this).
-
P2PS splice tube has two ridges, P2S has one ridge. Splice tuning old settings should work for new core, (2, -3, 2) splice tuning settings may have to be used if splices are too big.
-
-
-
Place the homing switch cover and ingoing drive covers back on, place thumbscrews back and rotate clockwise to hold in place.
-
Please avoid over-tightening any screws for all of the steps above.
-


If you have any additional questions, please send us a message at support@mosaicmfg.com.
If you have any additional questions, please send us a message at support@mosaicmfg.com.
Cancel: I did not complete this guide.
3 other people completed this guide.
