


Disclaimer (18 Dec. 2018):
Printing with flexible filaments is challenging and can be unreliable. Printing with flexible materials and Palette 2 is only recommended for advanced users. Using Palette 2 and flexible filaments should only be done after perfecting printing with the same flexible materials on the printer without Palette. Similarly, it is strongly recommended to complete several successful multicolor prints using rigid filaments with Palette before switching over to print with flexible materials.
The purpose of this article is to help you achieve success with your first flexible print. It is assumed that you have already has several successful multi-color prints with your Palette 2 and printer using rigid materials like PLA and PETG. It is also assumed that you have tried the flexible materials you are about to use on your printer and have achieved reliable printing results.
We do not recommend that you use elastomeric materials like TPE (Ninjaflex) with Palette 2 as they are very unreliable and challenging to work with and print with. We would similarly not recommend using materials together which have different levels of rigidity such as using PLA and TPU together. These combinations are very challenging to be printed reliably by most printers as well as by Palette 2. These material’s and combinations are not officially supported by Palette 2, and for these reasons would be considered experimental. For full details on supported materials and combinations, please refer to this article.
Note that this guide is likely to change once additional features have been implemented into the system to support printing with flexible materials (expected early 2019). We will release updates to this guide as soon as additional workflows are added and features are improved.
Overview
Only attempt to print with flexible materials if you are an advanced user and have mastered printing with rigid materials with Palette 2. Don’t mix harder materials with softer ones in the same print. Streamlined support for this entire process is coming in 2019 but for now, please carefully follow the instructions below.
- Re-run “Calibrate Palette” from the Palette Settings screen for select flexible material.
- Run a Splice Tuning demo with select flexible material.
- Input optimal flexible Splice Settings into CANVAS as a new Material.
- Create a new Printer Profile for flexible materials by duplicating your printer profile
- Set Outgoing Tube Length to 10cm under Settings > Preferences on the Palette screen. Assist feeding flexibles through Outgoing Tube during loading.
- Run Mosaic Keychain Calibration Print. Add a skirt to all Flexibles prints. Regardless of outcome, rate 4 or 5 stars to save Historical Modifier and Length Offset (for the first print). Repeat as necessary until Keychain is on calibration.
- Print a model of your choice using flexible materials and this new material-specific print profile.
Step 1: Calibrate Palette System for Flexibles
Before getting started with the Palette 2 system and flexible materials, it is critical that the system is re-calibrated in terms of Steps per Count (SPC) and Pulses per Millimeter (PPM) with the flexible material. In the internal testing conducted by Mosaic, as much as a 10% difference in drive distance was experienced between select flexible and rigid materials. This means that the system will not drive as much filament as expected for any given length of movement, resulting in calibration errors.
To re-calibrate the system, go to Settings > Calibrate Palette and follow the instructions when prompted. Be sure to run this calibration with the flexible material you intend on printing with. For in-depth instructions, please see here: http://mm3d.co/calibrate-p2
Once you complete this calibration with a set of TPU materials, your Palette is now internally calibrated for TPU. If you switch back to rigid materials like PLA to PETG, please repeat step 1 to return the system to rigid material calibration (the ability to save multiple configurations is coming in early 2019).
Step 2: Splice Tuning with Flexibles
Once the system has been calibrated for Flexibles, we recommend running a Splice Tuning demo with your particular filament. We have recommended starting parameters for TPU-TPU splices in our Splice Tuning Guide, but depending on the material these may need to be modified.

Once Splice Tuning has been optimized, be sure to record your values before saving to your Palette 2 as they will be required to be entered into CANVAS in the next step.
Step 3: Input Splice Settings into CANVAS
Once your Splice Settings have been tuned, it is recommended to add them into CANVAS for all future prints. You can do this by creating a new Material and updating your Splice Settings for that material.
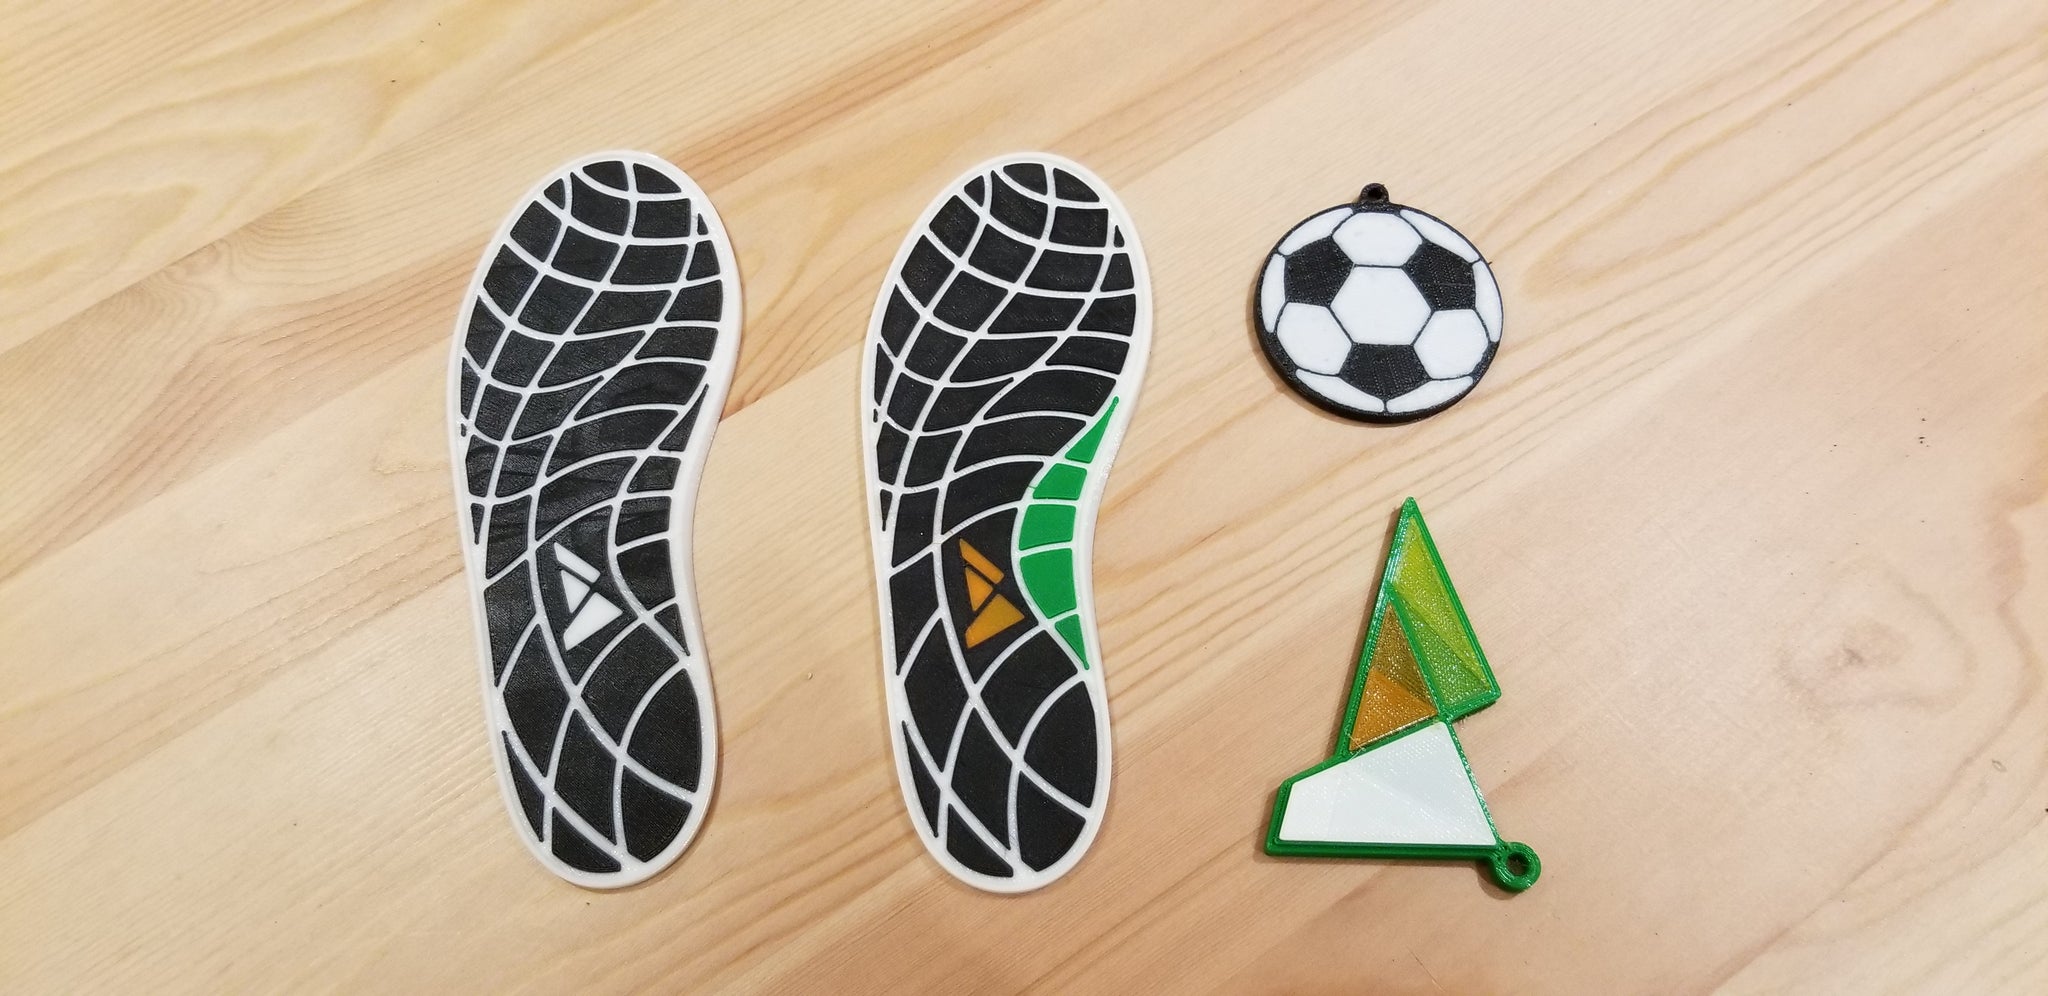
To do this, go to CANVAS and load in a model. We recommend the Mosaic Keychain Calibration Print.
Once loaded, go to the Color tab and color your model by dragging the colors to the different bodies of the model. Once colored, click on one of the colors to enlarge the Color and Material Menu. From the Color and Material Menu, select + Add Material to create a new Material. We recommend making the name of this new material the brand and material type of your filament to avoid confusion in the future. Select from the drop-down list the type of material you plan to use - for example, TPU - and then Save Material.

Once this material has been saved, you can select the type of material for the corresponding input. For example, if Input 1 is Grey TPU, you can select the color Grey and the material type as TPU. This will save your splice settings for this input automatically for all future splices using Drive 1.

Once you have created a new Material, select Splice Settings at the bottom of the Color and Material Menu. This will take you to the Splice Settings page.

Within the Splice Settings page, select the First and Second Materials in order to edit the splice settings based on Input and Output of the splice.
For example, if you wish to splice TPU-TPU, select TPU as both the First Material and the Second Material. If you wish to splice TPU-PLA, select TPU as the First Material and PLA as the Second Material. This allows for different splice settings based on which material is leading and which material is following.
From this page, input the optimized Splice Tuning settings from the previous step for the new material. In the example shown above, the values are (2, 4, 3) for Heating Factor, Compression Factor, Cooling Factor.
Save these settings for the First and Second Material. For all future prints where the First Material is to be spliced to the Second Material, CANVAS will input these settings so long as the material is selected through the Color and Material Menu.
Step 4: Create a Flexibles Printer Profile
Currently, in the Palette 2 and CANVAS workflow, the capabilities for multiple printers to be saved as a unique set of Historical Modifier and Loading Offset settings exists. This allows a user to move their Palette 2 system between printers without having the wrong Historical Modifier apply to their print, causing calibration errors.
It is recommend leveraging these capabilities for using flexibles on existing printers without overwriting past Historical Modifiers. This will allow the system to generate a separate profile for when flexibles are to be used, creating a unique set of calibration modifiers.
This process allows the system to tune itself specifically to the flexible material that is to be used. Given flexibles operate very differently within the system than rigid filament (in our testing, up to 20% different), it is recommended that the system be tuned as if it were a separate printer profile.
In essence, this is a work-around. Plans for a future “Flexible Mode” are currently underway, but are not likely to be released until 2019. For the time being, we recommend the following process:
-
Start a New Project in CANVAS, and when prompted to select a Printer, select + Add New.
- Create a new Printer Profile in CANVAS by creating a profile from scratch, utilizing the printer presets, or importing from another slicer. We recommend naming your Printer Profile as the Printer Type and “Flexibles” to avoid confusion.

- Select your Palette system and whether it is Connected or Accessory.

- Once the profile has been saved, load in new print files into CANVAS, or edit an existing project to your new Flexibles Printer Profile.
- For all future projects using Flexibles, we recommend using this Flexibles Printer Profile.


It is also highly recommend to add a skirt to prints when printing with flexible materials. This forces the first piece length to be quite long, often filling the entire Outgoing Tube Length before starting splicing. This will help prevent buckling in the Buffer with flexibles due to inconsistencies from splicing. It also helps to prime the extruder for consistent extrusion before printing a part.
Step 5: Set Outgoing Tube Length to 10 mm
Before starting a print on your Palette 2 system with the Flexibles Printer Profile, we recommend setting the tube length to 10 mm. You can do this by going to Settings > Preferences > Outgoing Tube Length and choosing 'Custom' then use the +/- buttons to select 10mm.
With the tube length set to 10 mm, Palette will require you to manually pull filament out of it as opposed to it automatically pushing filament through the buffer and tube. It has been shown that for flexible materials, manually pulling is more reliable than automated loading and is highly recommended.
Once enough filament has been pulled out of Palette to fill the Teflon tube, please feed the filament through the Palette tube and clip the tube back into Palette. Proceed to load the printer’s extruder as normal.
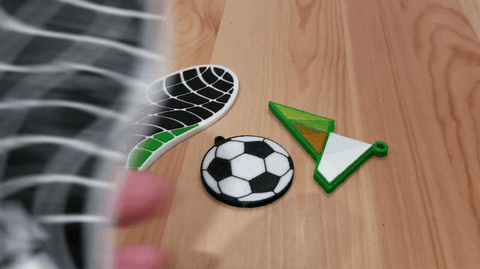
Step 6: Run Mosaic Keychain Calibration Print
At this point, the system is ready to complete its first Flexibles print. We recommend running the Mosaic Keychain Calibration Print in order to begin training your printer to print with this Palette with flexible materials.
Be sure to load the files into CANVAS and when assigning colors, select the correct materials for each drive. In the Settings Tab, we recommend adding a skirt as mentioned in a previous step.
Start the print using the CANVAS Hub or by SD card and once filament has loaded past the buffer zone, we recommend manually pulling the filament to prevent buckling due to friction along the outer edge of the Buffer. Once the filament is loaded into the extruder, the system will work autonomously.
It is recommended to check your Ping values during the print by opening the print menu and selecting Ping Offset History. If no Ping values are received by the end of the print, we recommend checking the Palette not Pinging with Flexibles section in the Tips and Tricks included below.
If the system Pings correctly, and the print finishes, be sure to rate the print a 4 or 5 regardless of calibration issues. This will help to tune the system for the next print.
It may require several Mosaic Keychain Calibration Prints before the system is adequately tuned for Flexible materials. We recommend repeating this process until the print is in calibration, which may take several tries.
If more than 5 prints are completed without being in calibration, please reach out to support@mosaicmfg.com for further assistance.
Completing each of the above steps correctly is critical to achieving success with printing flexible materials. If calibration is incorrect after several prints, we would recommend repeating the steps above.
Step 7: Print with Flexibles!
Hey Multi-Flexible-Print User! Congratulations, you made it!
You have successfully calibrated the system for flexibles, tuned your splices for your particular material, created a Flexibles Printer Profile for your printer(s), reset your Outgoing Tube Length, run the Mosaic Keychain Calibration Print (possibly several times) and now you’re here.
We’re so proud of you! Way to go!
We know it’s been a long, challenging process, but we’d love to hear your feedback on how to make that better!
We are always looking to improve things for our customers, and have some big plans in the works, so we appreciate your patience with this current process. We will be making changes in 2019 to make this workflow much simpler. That being said, you now have personal experience that we’d love to hear about!
What did you love? What did you hate? How could we make that better?
And most importantly, what are you going to do with your new-found superpowers?
Let us know at support@mosaicmfg.com. We’d love to hear from you!
Happy (Flexible) Printing!
Additional Notes
- If you want to go back to printing with rigid materials, you will need to re-run Calibrate Palette with your rigid materials to reset your SPC and PPM values for those materials.
- You will also likely want to reset your Outgoing Tube Length to something less manual. You can do this by going to Settings > Preferences > Outgoing Tube Length and selecting the appropriate size.
- We recommend using your normal Printer Profile for non-flexible prints and not combining the two (at least for now) so that flexible calibration stays for flexibles, and rigid calibration for rigid materials. This will help for overall calibration of your system.
-
We would LOVE to see what you’re printing. Tag us in pictures on Instagram @mosaicmfg or email us directly at support@mosaicmfg.com.
Tips and Tricks: Flexibles and Palette 2
Filament is Jamming Upon Loading in Ingoing Drives
Ensure your filament is consistent and doesn’t have signs of wear, buckling, or previous damage on it. If the filament is not straight and consistent, buckling in the drives can occur.
Additionally, we recommend checking that all the paths are clear, switches are working, and no other issues are leading to jamming in the ingoing drives. Occasionally, a separate part of the system fails and then the filament in the ingoing drives buckles and jams. This might look like an ingoing drive issue, but is actually something else.
If neither of these suggestions fix the issue, please get in touch with us at support@mosaicmfg.com.
Filament is Jamming in Outgoing Drive
There are a few reasons filament might jam in the Outgoing Drive:
- Filament has been overheated and buckles in the outgoing while leaving the Splicer. We recommend turning the Heat Factor down slightly, and increasing the Cooling Factor, or tuning your splices. More information on Splice Tuning can be found here.
- Filament is pushing around the buffer and into the outgoing tube, but the excess friction causes buckling of the filament in the Outgoing Drive resulting in a jam. It is recommended to help the Palette 2 system load filament through the Outgoing Tube until engaged and being pulled by the Extruder Drive (see Step 5 above). As long as flexible filament is being pulled as it is pushing into the Buffer, jams should not occur.
- Filament has been damaged and has inconsistencies resulting in buckling. It is recommended to use only previously unused flexible filaments for this reason.
If none of these recommendations fix the problems being experienced, please contact support@mosaicmfg.com.
Filament is Buckling in Buffer
In some rare cases, we have seen that filament will buckle within the buffer as it is trying to push through the encoder or out of the unit. This is usually due to excess friction in the encoder hub or filament catching on something on the buffer cover. We recommend checking for dust, broken filament, or particulate that may have lodged under the encoder preventing smooth rotational motion. The encoder hub should spin very easily and with little resistance. If resistance is felt, please contact support@mosaicmfg.com and we can walk you through cleaning and replacement if necessary.
Pong Switch Pressed and Not Making Filament
There are a variety of reasons that this might occur. We’ve outlined a few below:
- You may have found a Firmware Bug. Unfortunately, this means you need to flash your Firmware with the latest version. Check out the Firmware Update page and follow the steps to update to the most recent Firmware.
- Your Flexibles SPC and PPM Calibration might be off. Try running Calibrate Palette again with Flexible filament and comparing the values. In the last step, when you are asked to remove filament slowly, be sure to pull gently, consistently, and as slow as possible. If you are unsure as to whether your values are acceptable or not, send us a message at support@mosaicmfg.com.
- You might have a broken switch or a deeper issue with your Palette 2 system. Fire us a message at support@mosaicmfg.com and we’ll do our best to get you back up and running.
Buckling in Printer Bowden Tube
This is more of a printer issue than a Palette 2 issue, but we’ve seen this occur often enough it is worth acknowledging outright. If you are trying to print too quickly, or the temperature of your extruder is too long, you may experience buckling in your Bowden tube over time. We would recommend increasing the temperature of your extruder and slowing down the print. If that doesn’t solve your issue, be sure to get in touch with us at support@mosaicmfg.com and we’ll do our best to help you out.
Palette not Pinging with Flexibles
Unfortunately, some printers consume flexible material at a rate that is substantially different than what the slicer expects them to which will cause Palette not to detect pings correctly. For example, the printer might be trying to consume 10 cm of filament over a given tool path sequence, but it may only use 8 cm. Part of our 2019 firmware plan will be to release a more robust solution for dealing with this but for now, some printers will not be able to ping using flexible materials with Palette. An experimental workaround is discussed below but is only intended for expert users.
If your system is not accepting Pings with Flexibles (but was with Rigid materials), we have a few recommendations below. If your system was not accepting Pings in general, please ensure this issue is resolved with rigid materials first. If these solutions do not solve the ping detection issue, please reach out to us at support@mosaicmfg.com.
If you are having Flexible-specific Ping issues, there are a few reasons for that. To better understand what is going on, we recommend becoming familiar with Pinging and Ponging in general here, and if you’re really eager, getting into the weeds here.
For Palette 2, we’ve improved our calibration mechanism substantially by tightening the limits at which Pings are registered, but in doing so, have introduced challenges for Flexibles in general.
The gist of what is happening is the printer is not driving flexible filament as expected compared to rigid filament, and as such giving a much lower Ping value. This is likely outside of the limits of what the system will accept. For example, if the Ping is registered at 80%, lower than the limits would permit, the Ping is rejected. This helps prevent false positives in the system and prevent wild swings in calibration due to “phantom Pings”.
In order to circumvent this system, we have found that manually increasing the Flow Rate (not Feed Rate) will increase the ratio of Extruder Drive Turns to GCODE Extrusion, possibly setting the extrusion rate much higher and causing the Ping values to record higher. In essence, we are telling the printer (manually) to drive more filament per unit extrusion in order to normalize the actual extrusion amount to the expected extrusion amount.
Practically, this might look like this:
If you own a CANVAS Hub, simply increase the Flow Rate by 5-25% once printing has started. We recommend starting with ~110% Flow Rate and increasing as needed until Pings are registered. This might take several attempts and reprints before they are accepted repeatedly, and you will need to manually increase this value once the print has started each time.
If you are not printing through a CANVAS Hub, most printers will have an in-print adjustment that can be made to extrusion in order to increase this multiple.

We acknowledge that this process is not ideal and are working to release an improved workflow in 2019.
If you are having difficulty with this, or struggling to understand the process, please don’t hesitate to reach out to us at support@mosaicmfg.com, and we’d be happy to help you through it. Thanks again for your patience!
Splices Breaking in Buffer
If splices are consistently breaking in the buffer, we recommend re-running Splice Tuning (Step 2 in the guide above) until optimal settings are found. Splices breaking is usually a system of non-optimal heat and compression settings, and we would recommend retrying this process before proceeding.
- The Mosaic Manufacturing Team