
Introduction
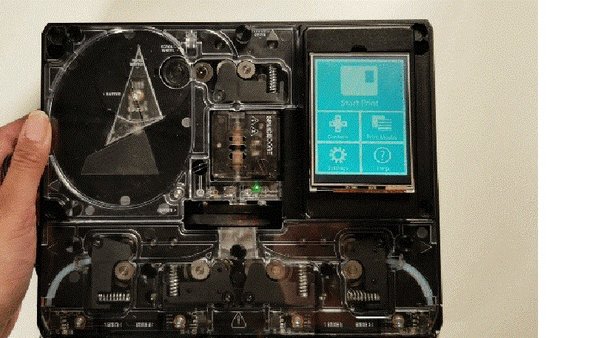
If your screen stops working or have other screen issues, please follow these instructions to replace it.
Tools
Video Overview
-
-
Turn Palette 2 off and remove the top lid by gently lifting from the sides.
-
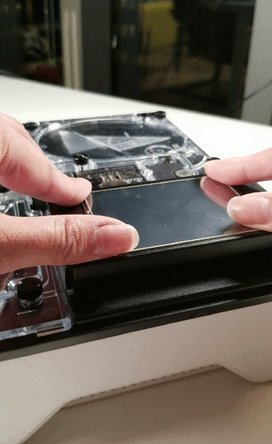
Use a flathead screwdriver to remove the old screen with its metal backing. You should be able to wedge the screwdriver to the bottom portion of the screen and pry the screen off.
-
Below where the screen rested, there is a connection for the cable ribbon from the screen. Flip the tab upwards to release the screen cable ribbon. Remove the old screen.
-
-
-
Once the screen is removed, place the adhesives provided in a square pattern on the face of where the screen will sit.
-
Gently place the cable ribbon from the new screen in the connector, it should be seated approximately 4mm into the connector. Push the tab downwards until you hear a click, the cable is now seated and locked in place.
-
-
-
Test that the screen is working. Connect the unit to its power supply and plug into a wall outlet. Turn on the unit to see if the screen works. If you find that the screen is not turning on, turn the unit off and unplug from its power supply. Try repeating steps 3 and 4 to make sure that the cable is properly seated on the connector.
-
If the screen turns on, proceed to stick the screen back in place. Flip the screen over and remove the protective tape from the adhesive. Place the screen back in its spot and push down to secure the adhesive.
-


If you have any additional questions, please send us a message at support@mosaicmfg.com.
If you have any additional questions, please send us a message at support@mosaicmfg.com.
