
Introduction
Before proceeding with the installation, please print the necessary conversion part STLs found below. Please note: The most recent versions of Palette+ will already have these pieces pre-installed.
-
-
Print these parts before proceeding with the Palette+ TPU conversion. Download the STL here.
-
-
-
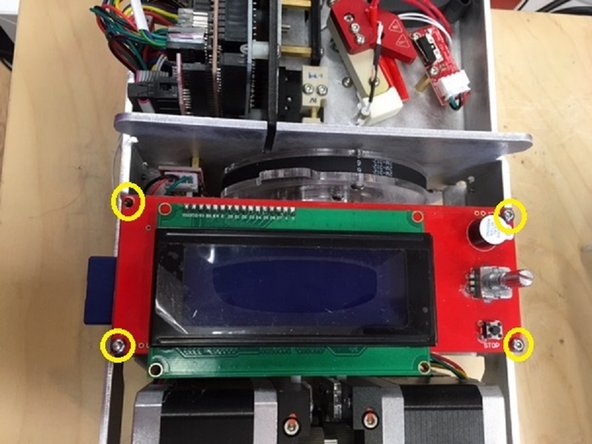
Unfasten the four screws securing Palette+'s top cover to remove.
-
Remove Palette+'s back plate
-
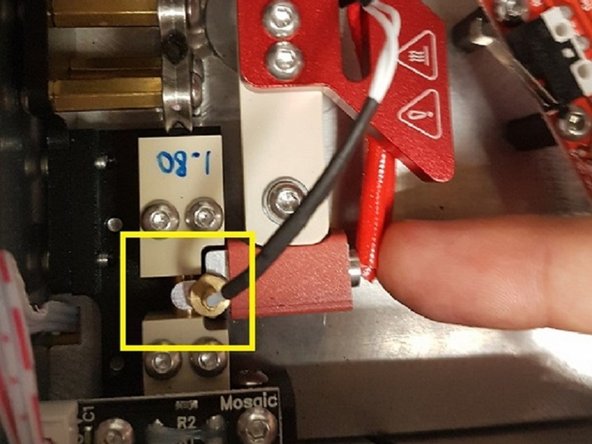
Unclip the Hall sensor (red) to access the hot tool arm. Remove the hot tool arm screw (yellow) to remove the hot tool.
-
Once you have access to the standoffs, please remove all standoffs except for the first and last ones in the top row. These are located in a tight space, so a hex-key would be your best option.
-
-
-
Install Cooling Rack Replacement part. Once this is installed, jog PLA all the way through Palette+ by following the menu: Utilities > Jog > Drive 1 > With Outgoing > Auto > (Rotate knob clockwise). Jogging filament through Palette+ confirms that the alignment of the Cooling Rack replacement is correct.
-
Re-install hot tool arm. When tightening the hot tool screw, press the hot tool against the splicing tube to ensure a good fit. To check if this is installed properly, the hot tool should fully enclose the splicing tube and have very little friction when moving back and forth. Run Splicer Distance (found under Calibration) afterwards.
-
Plug the Hall Sensor back in. Follow the instructions to install the Merger Guide and Drive Covers, and then replace Palette+'s back plate and covers.
-
-
-
Unfasten the four screws securing Palette+'s top cover to remove.
-
Remove Palette+'s screen by removing the four screws at its corners.
-
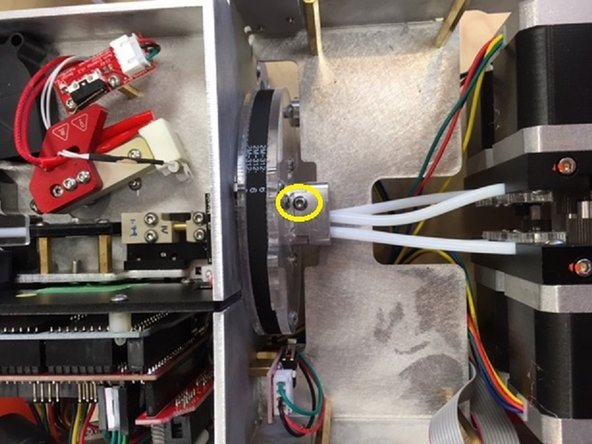
Detach the merger by removing the screw securing Palette+'s clamshell to the cutter.
-
Insert Merger Guide over the 4 Teflon tubes. Ensure that the slots are aligned with the tubes and place the assembly back into the funnel. Reassemble the clamshell and merger.
-
Once installed, follow the instructions below to install the Drive Covers before reassembling Palette+.
-
-
-
Unfasten the four screws securing Palette+'s top cover to remove.
-
Remove Palette+'s screen.
-
Detach the merger by removing the screw securing Palette+'s clamshell to the cutter.
-
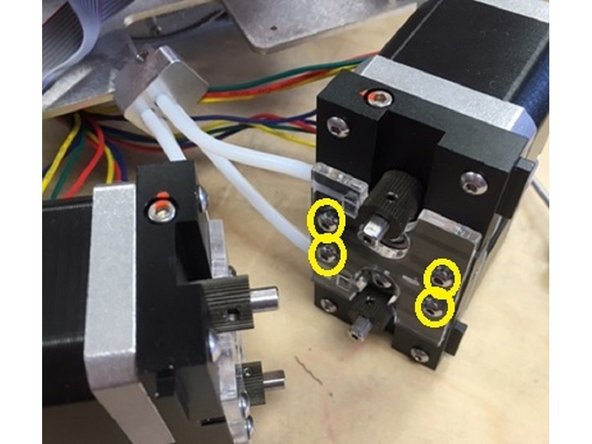
Remove the 6 screws on Palette+'s front plate to remove plate and drive fasteners.
-
Pull out and isolate the drive sets as you will want to work with them one at a time. Take off the acrylic drive plate on one set by removing the highlighted fasteners for each pair. Repeat this step for the second set of drives.
-
ONLY UNSCREW THE BOLTS INDICATED! Unscrewing other bolts will ruin calibration.
-
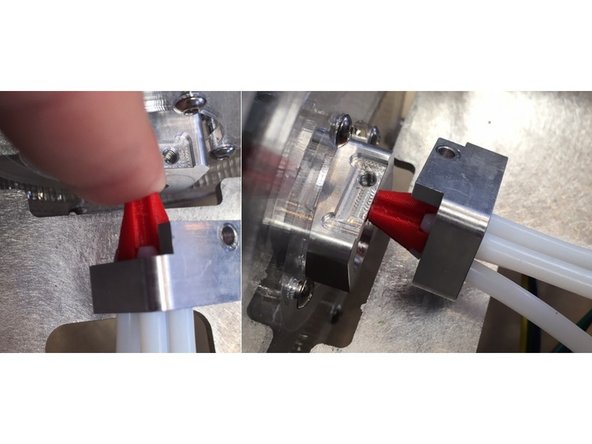
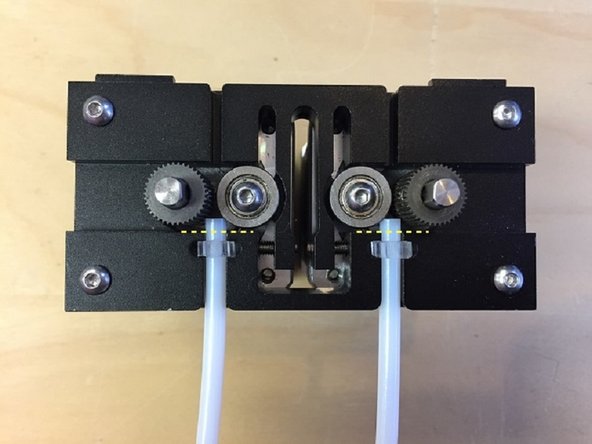
Remove the acrylic drive plate and cut the Teflon tubing while they are still clamped into the drives. The tubes should now be in line with the edge. To avoid slippage, you can hold the ends of the tubing with pliers when cutting.
-
-
-
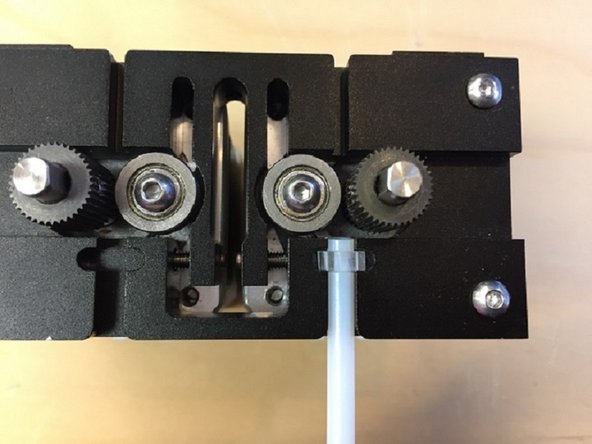
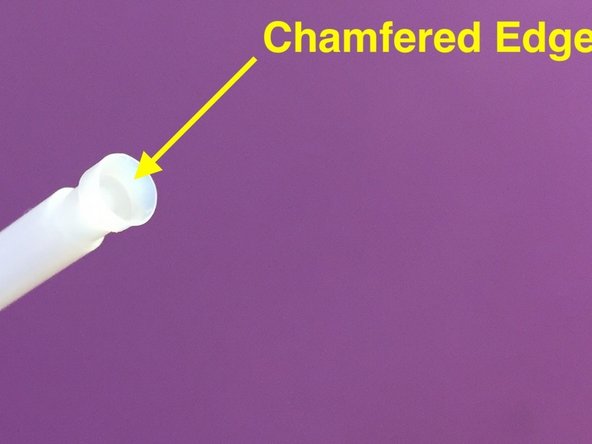
Remove the Teflon tubing from the drives. The tubes will need to be chamfered, which can be done with a chamfering tool or with another tool (such as a scalpel).
-
Replace the Teflon tubing on the drives and install the Drive Cover with the flat side facing up. The cover may be tight, so ensure that the cover rests flat against the drives. Please also ensure that the square cutouts are in-line with the acrylic tube holders.
-
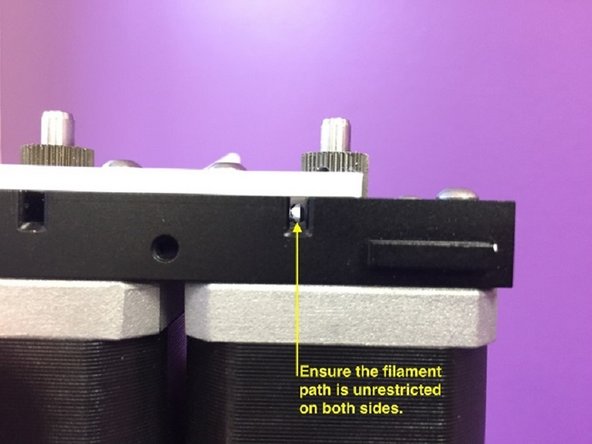
Once installed, check to see if the filament path is clear and unrestricted on both sides. Manually jog filament through to verify that there are no blockages.
-
Repeat for the other pair of drives.
-
Reassemble by reversing the above steps.
-


If you have any additional questions, please send us a message at [mailto|support@mosaicmfg.com}
If you have any additional questions, please send us a message at [mailto|support@mosaicmfg.com}
